
Using Amazon S3 with Vapor
In one of my projects I had to deal with uploading images to the Vapor server. I thought about two different ways of resolving this issue — uploading to my server or using a third party storage. I decided to use Amazon S3.
My plan consisted of three steps:
- GET request to the backend for presigned url used to upload a photo to Amazon storage
- Uploading a photo
- Triggering a webhook on Vapor backend using lambda function
Part 1 — Creating a bucket on AWS
To start with point 1 of our roadmap we’ve to setup a new bucket in the AWS Management Console. So, let’s head to: console and choose Services, and in the Storage tab let’s choose S3. You can see it in the screenshot below:

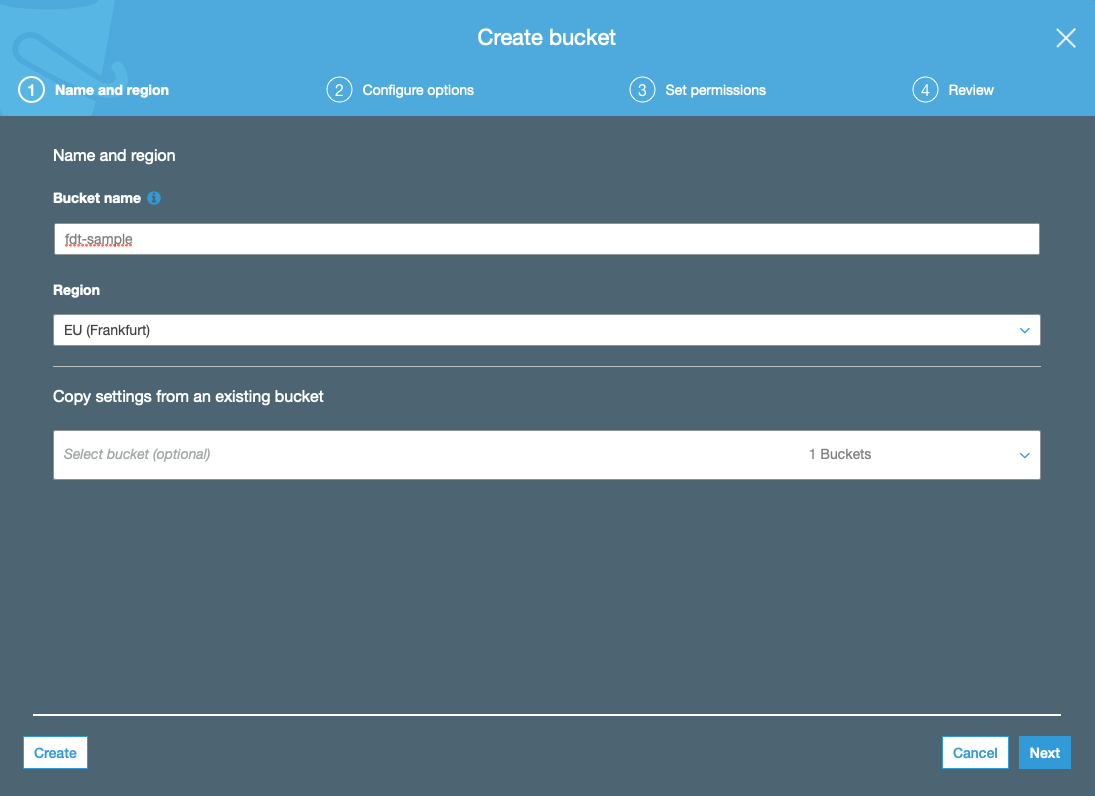
Now press the Create bucket button and fill in the Bucket name and Region fields.
I’ve named my bucket fdt-sample. In the Configure options tab uncheck Block new public ACLs and uploading public objects (Recommended). You can leave the rest as is.

Part 2 — Creating an IAM user
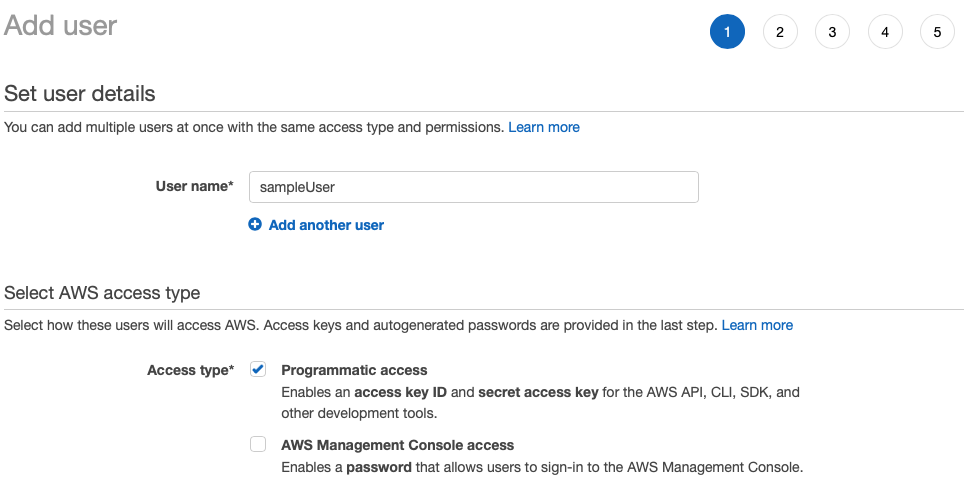
Now we need to create a user used for creating presigned URLs. So, let’s head to IAM Management Console and press the Add user button. Fill the form with User name and choose Programmatic access in the Access type tab. We chose Programmatic access because we want to receive an access key ID and secret access key. Continue by clicking Next: Permissions button.
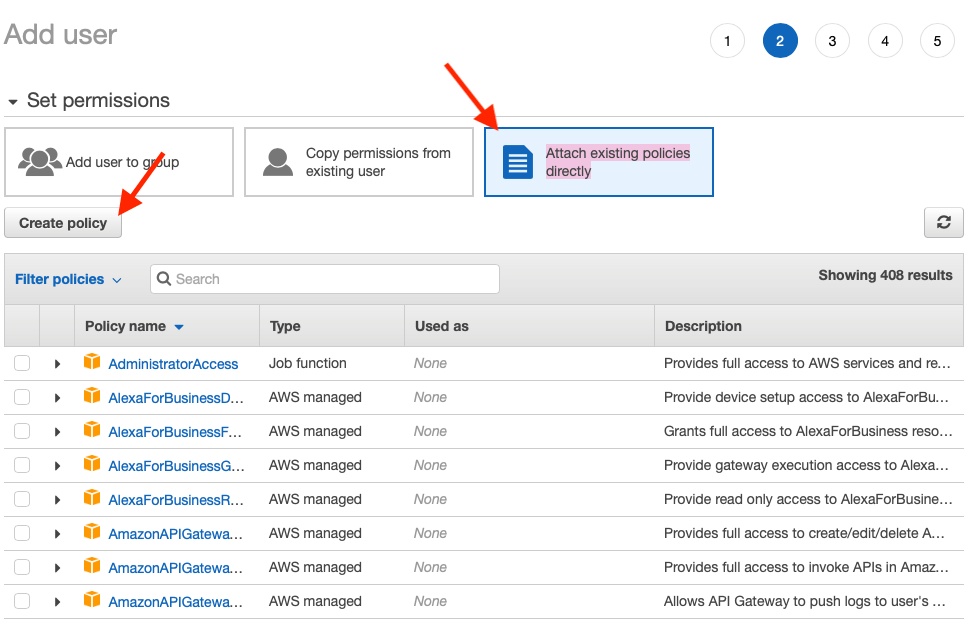
Now, we will need to set user’s permissions. Head to the third tab, Attach existing policies directly, and click the Create policy button.
This will redirect us to the new page. We can setup a policy using visual editor or JSON. We wish to use second option — paste JSON.
Here is our policy:
Remember to change bucket-name to the name of your bucket!
{
    "Version": "2012-10-17",
    "Statement": [
        {
            "Effect": "Allow",
            "Action": [
                "s3:PutObject",
                "s3:PutObjectAcl"
            ],
            "Resource": "arn:aws:s3:::bucket-name/upload/*"
        }
    ]
}
We allow the user to put objects in the /upload/ directory by setting the Access Control List for uploaded files. We want all images to have a public-read ACL.

Next click Review policy. Fill the name of the policy and end by clicking the Create policy button.
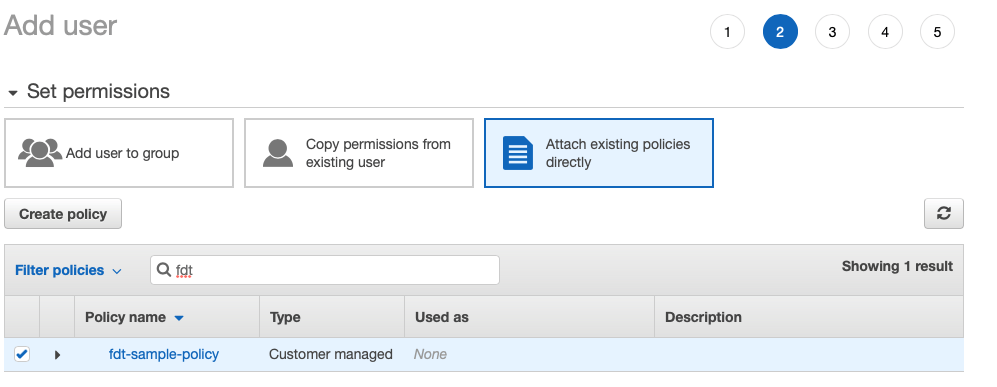
Let’s go back to creating the user. Reload available policies, search for the one you’ve just created and select it. Click the Next button a few times, and finally click Create user.
It will redirect us to page with user’s Access key ID and Secret access key. Let’s save them. We will need them later.
Part 3 — Setup Amazon S3 in Vapor
Finally, let’s start coding! 
We will use two packages:
- S3 — this manages generating presigned URLs for us.
- VaporExt — this helps us with storing environmental variables.
So in Package.swift file add these two packages:
.package(url: "https://github.com/vapor-community/vapor-ext.git", from: "0.1.0")
.package(url: "https://github.com/mlubgan/S3.git", .revision("589ae7fea85bfb7f8ec23eb55664df67db289c49"))
and call vapor update -y in the project’s directory.
Now, let’s create an aws-config.env file in the project’s directory and fill it with neede configuration.
Remember to change:
bucket-nameto the name of your bucket- set the correct access key and secret key (they were generated in previous part)
- set the correct region: Here is the list
BUCKET_URL=https://bucket-name.s3.amazonaws.com/
BUCKET_IMGPATH=upload/
BUCKET_NAME=bucket-name
BUCKET_ACCKEY=Access key ID
BUCKET_SECKEY=Secret access key
BUCKET_REGION=region, eg. eu-central-1
Ok, now we should unwrap these variables and configure S3 signer.
We need a class responsible for unwrapping the .env file and registering a S3 service.
import VaporExt
import S3

// MARK: - Class responsible for holding AWS config
public struct AwsConfig {

    var url: String
    var imagePath: String
    var name: String
    var accKey: String
    var secKey: String
    var region: Region

}

// MARK: - Class responsible for providing correct AWS configuration
class AwsConfiguration {

    // MARK: - Instance Methods
    func setup(services: inout Services) throws -> AwsConfig {
        Environment.dotenv(filename: Keys.filename)
        guard
            let url: String = Environment.get(Keys.url),
            let imagePath: String = Environment.get(Keys.imagePath),
            let name: String = Environment.get(Keys.name),
            let accKey: String = Environment.get(Keys.accKey),
            let secKey: String = Environment.get(Keys.secKey),
            let regionString: String = Environment.get(Keys.region) else {
                fatalError("Missing values in .env file")
        }

        guard let regionName = Region.RegionName(rawValue: regionString) else {
            fatalError("Incorrect region in .env file")
        }
        let region = Region(name: regionName)

        let config = AwsConfig(
            url: url,
            imagePath: imagePath,
            name: name,
            accKey: accKey,
            secKey: secKey,
            region: region
        )

        let s3Config = S3Signer.Config(
            accessKey: accKey,
            secretKey: secKey,
            region: region
        )

        try services.register(
            s3: s3Config,
            defaultBucket: name
        )

        return config
    }

}

// MARK: - Extension with keys used in .env file
private extension AwsConfiguration {

    struct Keys {

        private init() { }

        static let filename = "aws-config.env"
        static let url = "BUCKET_URL"
        static let imagePath = "BUCKET_IMGPATH"
        static let name = "BUCKET_NAME"
        static let accKey = "BUCKET_ACCKEY"
        static let secKey = "BUCKET_SECKEY"
        static let region = "BUCKET_REGION"

    }

}
We will want to have access to AwsConfig for some controllers so let’s modify the routes.swift file.
public func routes(_ router: Router, awsConfig: AwsConfig) throws {
And finally let’s configure it in configure.swift in configure method.
/// Configure AWS S3 Signer
let awsConfig = try AwsConfiguration().setup(services: &services)

/// Register routes to the router
let router = EngineRouter.default()
try routes(router, awsConfig: awsConfig)
services.register(router, as: Router.self)
Part 4 — Create presigned URLs with Vapor
The time has come to create the first endpoint. It will be a GET endpoint used to download a presigned URL from Vapor.
import S3
import Vapor

/// Class responsible for handling AWS S3
final class AwsController: RouteCollection {

    // MARK: - Properties
    private let awsConfig: AwsConfig

    // MARK: - Inits
    init(awsConfig: AwsConfig) {
        self.awsConfig = awsConfig
    }

    // MARK: - Instance methods
    func boot(router: Router) throws {
        let group = router.grouped(Path.base.rawValue)
        group.get(use: preparePresignedUrl)
    }

}

// MARK: - Extension with Paths
extension AwsController {

    enum Path: String {

        case base = "aws"
        // GET: - "/aws" - gets presigned URL for uploading image

    }

}

// MARK: - Extension with preparePresignedUrl method
private extension AwsController {

    /// Prepares presigned URL, user should send PUT request with image to this URL
    func preparePresignedUrl(request: Request) throws -> String {
        let baseUrl = awsConfig.url
        let imagePath = awsConfig.imagePath
        let newFilename = UUID().uuidString + ".png"

        guard var url = URL(string: baseUrl) else {
            throw Abort(.internalServerError)
        }
        url.appendPathComponent(imagePath)
        url.appendPathComponent(newFilename)

        let headers = ["x-amz-acl": "public-read"]

        let s3 = try request.makeS3Signer()
        let result = try s3.presignedURL(for: .PUT, url: url, expiration: Expiration.hour, headers: headers)

        guard let presignedUrl = result?.absoluteString else {
            throw Abort(.internalServerError)
        }

        return presignedUrl
    }

}
This controller has awsConfig property so we have to inject it inside routes.swift.
public func routes(_ router: Router, awsConfig: AwsConfig) throws {

    let awsController = AwsController(awsConfig: awsConfig)
    try awsController.boot(router: router)

}
Let’s check if it works — compile and run project.
In a terminal paste:
curl "http://localhost:8080/aws"
and if everything was set up correctly, it should return an url where we will upload a photo in next part.
Part 5 — Uploading a photo
This is the easy part. Just make a PUT request to the url returned by a GET endpoint from previous part. It is important to add a ["x-amz-acl" : "public-read"] header. I will use Postman to send this request.
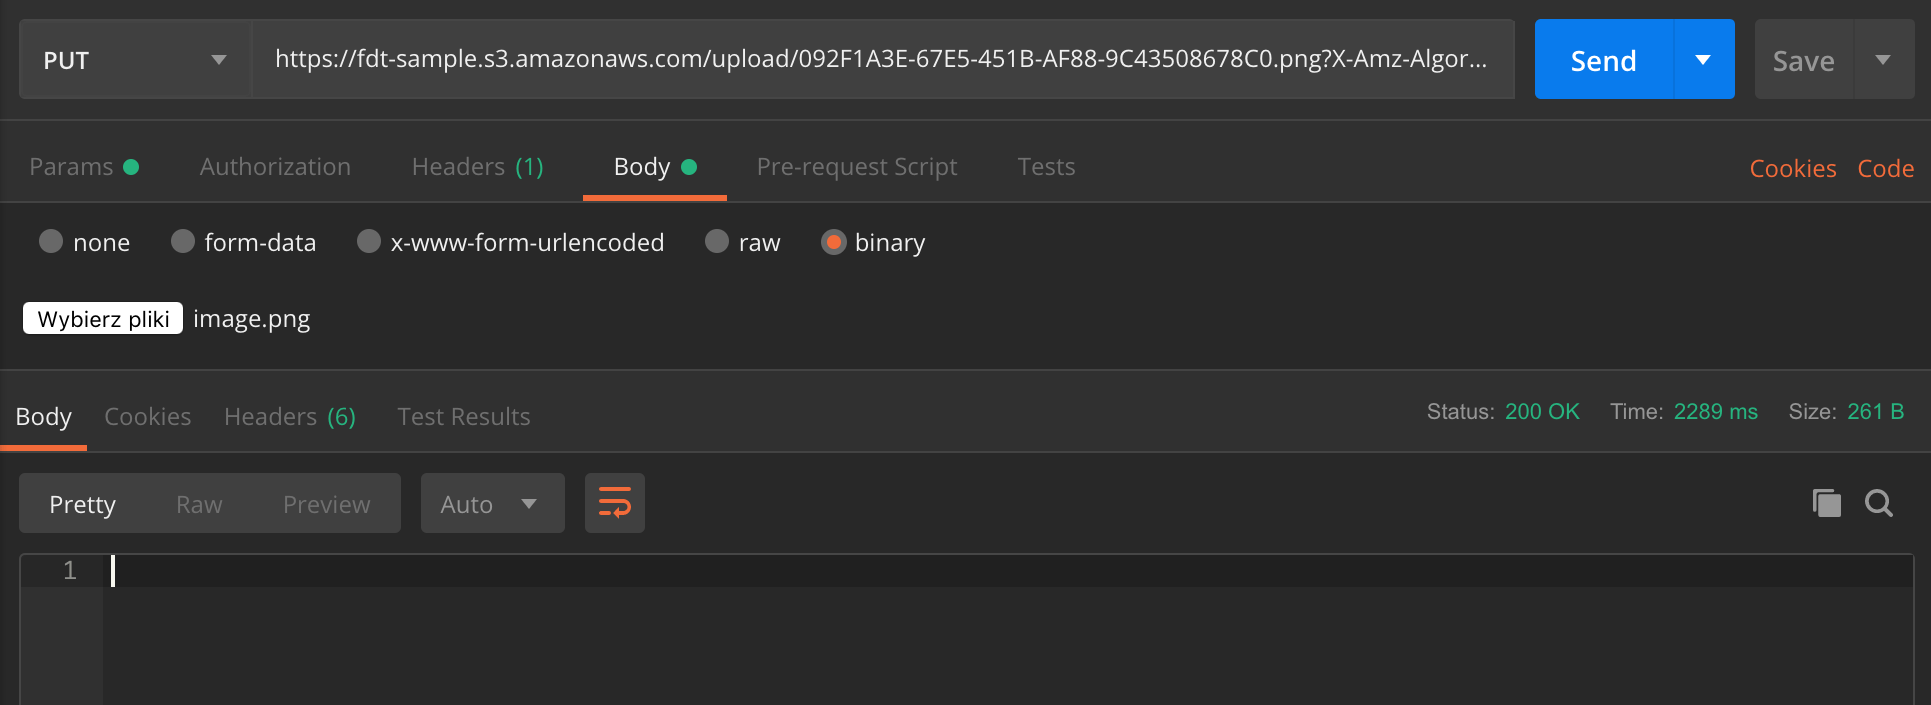
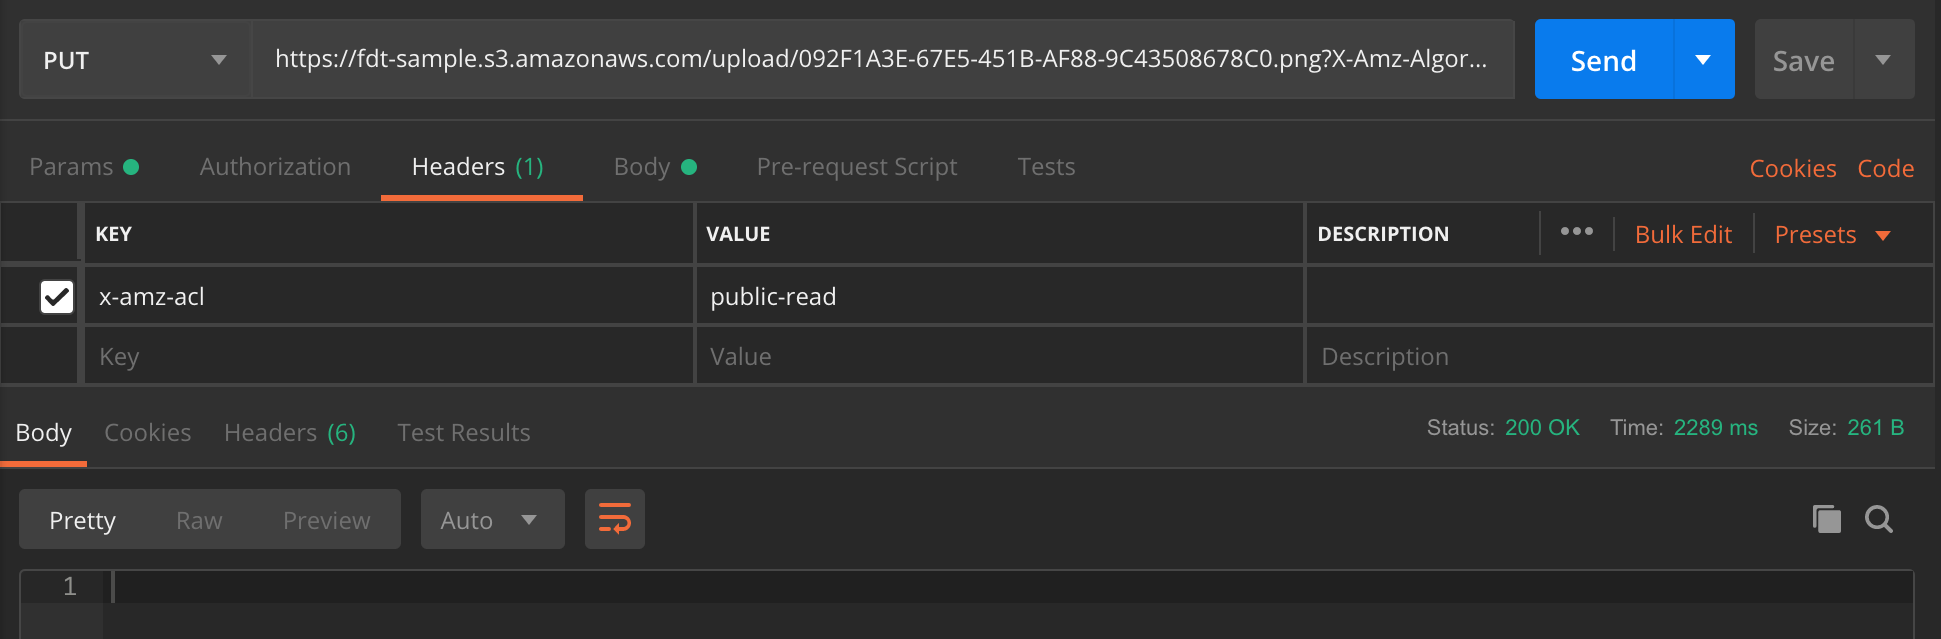
You should receive Status 200 OK.
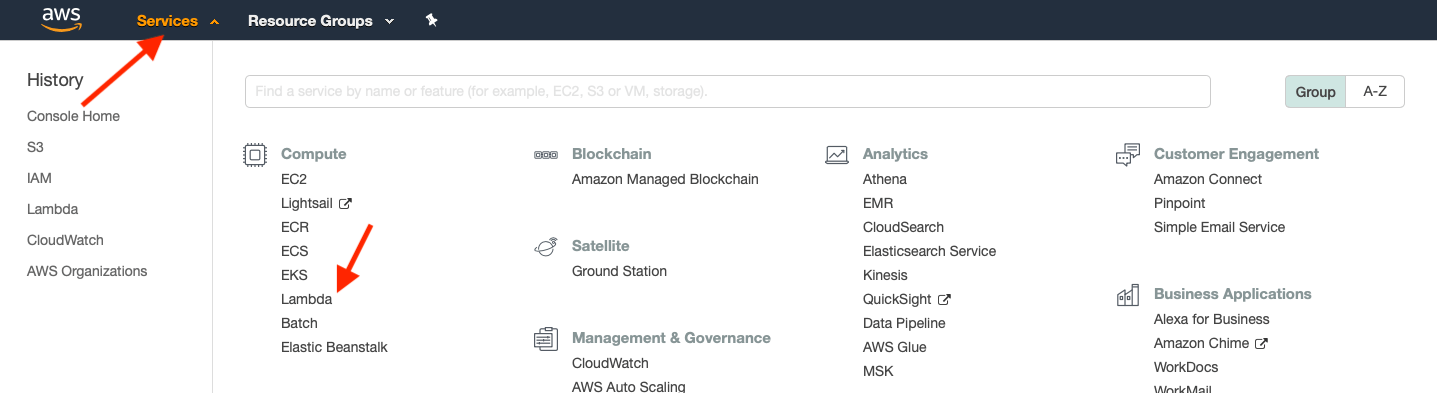
Part 6 — Calling a webhook on completion
Ok, an image is uploaded, but our server doesn’t know. We’d like to be notified on completion by Amazon S3. Let’s create a lambda function to achieve this.
Open console and choose Services, and in the Compute tab choose Lambda.
Now we have to add a new function so press the Create function button.
It is important to choose the correct region so make sure you have done so. You can see the currently selected region in the top right corner (near your username).

In the next step you should fill the function form and proceed with the Create function button.

Now we want to add an S3 trigger, so search for it, and fill the form below with the correct Bucket and Event type (for this tutorial it’s an All object create event). You can add a Prefix if you want to be notified only about creating objects in some directory. Then save changes using the orange Save button in the top right corner of the form.
Finally, let’s add some code to our Lambda function and save the form. This function basically sends the uploaded filename to our endpoint.
Remember to change host to the correct host!
import json
from botocore.vendored import requests

def lambda_handler(event, context):

    filename = json.dumps(event['Records'][0]['s3']['object']['key'])
    headers = {
        'Content-type': 'application/json',
    }

    data = '{"filename":' + filename + '}'
    response = requests.post('http://32b69352.ngrok.io/aws/new', headers=headers, data=data)

    return {
        'statusCode': 200,
        'body': data
    }
Tip
If you are testing this app on your localhost then you can use ngrok to create a public URL for your host.
You can see that this script is heading to aws/new endpoint. We don’t have it yet. So let’s go back to Vapor.
First: we need a struct to decode lambda’s function message.
struct ImageResponse: Content {

    var filename: String

}
Now, we can modify our boot method, and Path enum to make an aws/new endpoint public.
func boot(router: Router) throws {
   let group = router.grouped(Path.base.rawValue)
   	group.post(ImageResponse.self, at: Path.new.rawValue, use: savedPhoto)
   group.get(use: preparePresignedUrl)
}
enum Path: String {

    case base = "aws"
    // GET: - "/aws" - gets presigned URL for uploading image

    case new
   	// POST: - "/aws/new" - called on image upload completion

}
// MARK: - Extension with preparePresignedUrl method
private extension AwsController {

    /// Triggered by Lambda function
    func savedPhoto(request: Request, input: ImageResponse) throws -> HTTPResponseStatus {
        print(input.filename)

        return HTTPResponseStatus.ok
    }

}
In the savedPhoto function you can handle this message however you want. For tutorial purposes I will only print the file name to the console.
Summary
Let’s try it:
- Make get request for presigned URL
- Upload a photo to url generated in step 1
- Check your console log

To sum up the whole process, let’s go through it step by step.
- A presigned URL is generated and is alive for an hour. After this time you can’t upload a photo using this link.
- A user uploads a photo using the presigned url and it’s stored in your bucket on Amazon servers.
- Once the upload is completed your Vapor backend receives a notification.
It’s a great way to avoid storing images and reducing a traffic on your server.
That’s it!